Canvas:Web绘图的工具
认识canvas
<canvas> 中文名叫 “画布”,是一个可以使用脚本(通常是JavaScript)在网页上绘制图形的HTML元素
HTML5中的 <canvas> 元素为Web开发者提供了一个通过JavaScript绘制图形的强大工具。无论是制作游戏、数据可视化还是创建动态图像,Canvas都是一个非常有用的技能。
使用canvas
快速入门
使用canvas的步骤如下:
HTML 中创建 canvas 元素
通过 js 获取 canvas 标签
从 canvas 标签中获取到绘图工具
通过绘图工具,在 canvas 标签上绘制图形
1 | <!-- 1、创建 canvas 元素 --> |
注意事项
- 使用canvas标签时要加上“画布”的宽高属性,不然会默认宽度300px,,高度150px
- 宽高的值不加px单位,直接设置数字即可
- 不能通过css设置canvas宽高,会出现内容被拉伸的效果
- 线条的默认宽度是 1px ,默认颜色是黑色,但由于默认情况下 canvas 会将线条的中心点和像素的底部对齐,所以会导致显示效果是 2px 和非纯黑色问题
- Canvas 使用的是 W3C 坐标系 ,也就是遵循我们屏幕、报纸的阅读习惯,从上往下,从左往右
- 如果话多个图如果不想相互污染,需要做2件事:
(1)使用 beginPath() 方法,重新开一个路径
(2)设置新线段的样式(必须项),如果只有第一个设置了样式,第二个画布的线段没有样式,那么会继承使用第一个线段的样式而不是默认的黑色之类样式
设置样式
lineWidth:线的粗细
strokeStyle:线的颜色
lineCap:线帽:默认: butt; 圆形: round; 方形: square
lineJoin:拐角样式:miter: 默认值,尖角;round: 圆角;bevel: 斜角
setLineDash([]):将描边设置成虚线
常用方法
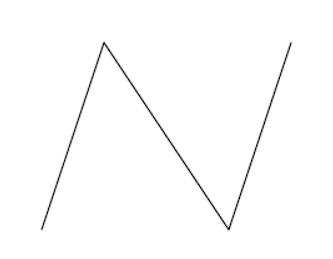
折线
和 直线 差不多,都是使用 moveTo() 、lineTo() 和 stroke() 方法可以绘制折线
1 | <canvas id="c" width="300" height="300" style="border: 1px solid #ccc;"></canvas> |
矩形
可以使用线段来描绘矩形,但 canvas 也提供了 rect() 等方法可以直接生成矩形
strokeRect() 描边矩形
strokeStyle 必须写在 strokeRect() 前面,不然样式不生效
strokeStyle:设置描边的属性(颜色、渐变、图案)
strokeRect(x, y, width, height):描边矩形(x和y是矩形左上角起点;width 和 height 是矩形的宽高)
1 | <canvas id="c" width="300" height="300" style="border: 1px solid #ccc;"></canvas> |
fillRect() 填充矩形
fillStyle 必须写在 fillRect() 之前,不然样式不生效
1 | <canvas id="c" width="300" height="300" style="border: 1px solid #ccc;"></canvas> |
矩形描边+填充
同时使用 strokeRect() 和 fillRect()会产生描边和填充的效果
1 | <canvas id="c" width="300" height="300" style="border: 1px solid #ccc;"></canvas> |

rect() 生成矩形
rect() 和 fillRect() 、strokeRect() 的用法差不多,唯一的区别是:
strokeRect() 和 fillRect() 这两个方法调用后会立即绘制;rect() 方法被调用后,不会立刻绘制矩形,而是需要调用 stroke() 或 fill() 辅助渲染
1 | cxt.strokeStyle = 'red', |
clearRect() 清空矩形
clearRect() 方法可以清空指定区域。
clearRect(x, y, width, height)
1 | <canvas id="c" width="300" height="300" style="border: 1px solid #ccc;"></canvas> |
清空画布
canvas 画布元素是矩形,所以可以通过下面的代码把整个画布清空掉
要清空的区域:从画布左上角开始,直到画布的宽和画布的高为止
1 | cxt.clearRect(0, 0, cnv.width, cnv.height) |
圆形
绘制圆形的方法是 arc()
绘制圆形之前,必须先调用 beginPath() 方法,在绘制完成之后,还需要调用 closePath() 方法
开始角度和结束角度,都是以弧度为单位。例如 180°就写成 Math.PI ,360°写成 Math.PI * 2 ,以此类推。
在实际开发中,为了让自己或者别的开发者更容易看懂弧度的数值,1°应该写成 Math.PI / 180
- 100°: 100 * Math.PI / 180
- 110°: 110 * Math.PI / 180
- 241°: 241 * Math.PI / 180
1
2
3
4
5
6
7arc(x, y, r, sAngle, eAngle,counterclockwise)
//x 和 y: 圆心坐标
//r: 半径
//sAngle: 开始角度
//eAngle: 结束角度
//counterclockwise: 绘制方向(true: 逆时针;
//false: 顺时针),默认 false
1 | <canvas id="c" width="300" height="300" style="border: 1px solid #ccc;"></canvas> |
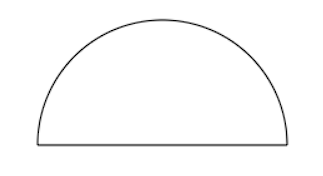
半圆
如果使用 arc() 方法画圆时,没做到刚好绕完一周(360°)就直接闭合路径,就会出现半圆的状态
1 | <canvas id="c" width="300" height="300" style="border: 1px solid #ccc;"></canvas> |
cxt.arc 最后一个参数没传,默认是 false ,所以是顺时针绘制
如果希望半圆的弧面在上方,可以将 cxt.arc 最后一个参数设置成 true